Trace or print the block diagram onto foundation paper, number, and cut out as in the photo.
Important!You have to mirror the diagram.
If you're using the software, remember to change the block size to 5" x 8" before printing.

Foundation piece all the sections and trim seam allowances to 1/4".

Sew the top two sections together.

Now, this is going to sound strange, but bear with me.
If you don't mind the seam in the middle, you can leave this section as is, but if you do...
Using a sharp seam ripper (I know you have one!), carefully remove the center (main fabric) section. Be careful to only rip out the stitches attaching the center to the rest, keeping the side, top, and bottom seams intact.
When you've removed the center piece, reinforce the side seams by stitching them again.

Cut a 2" x 3" piece of main block fabric and lay it right side up on the table.
Lay the block section right side up on top of it, making sure that the diamond shaped hole completely covers the main block fabric.
Baste close to the edge all around the diamond. You don't have to worry about staying away from the edge since your seam allowance is already turned under.
Use an applique stitch to attach the block section to the main fabric rectangle.
Trim away excess fabric and remove the basting.

Trace or print the block diagram again, this time onto the dull side of freezer paper. Cut out the top and bottom block sections. If you were using freezer paper for your foundation piecing, carefully remove it from the back and use it again.
Carefully position the freezer paper sections onto the right side of your pieced sections and iron in place.

Cut a 3 1/2" x 3 1/2" square out of main block fabric and lay it right side up on the table.
Remove some of the bulk fabric from the center seam of the block section and clip the seam allowance almost to the freezer paper.
Place the bottom block section right side up on top of the fabric square, making sure that the seam allowance on the top of the block section covers the fabric square completely.
Baste securely through all layers, staying far enough away from the freezer paper edge to allow for the seam to be turned under.

Reverse applique along the top edge of the block section. This will form the bottom left and right edges of the center diamond.
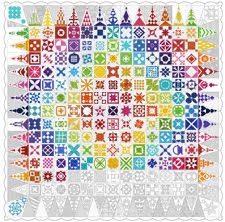
I completely forgot to take photos here, so I'm inserting a diagram from the Rainbow Jane BOM.
Follow the same steps for the top block section, i.e. trim and clip the seam allowance at the center seam, baste and reverse applique.

Trim away the excess fabric, remove the freezer paper and press.


This is a handsome triangle.
ReplyDeleteDear Anina:
ReplyDeletei did this triangle a year ago in a somewhat different fashion. It has more seam lines in the white area, but is an alternative method.
http://viridian61.blogspot.com/2008/04/triangle-needles-point-my-solution.html
Thnak you for posting such lvely blocks and pictures.
Hey, thanks for the comment on my blog. I don't do Outlook and I don't know your regular email addy to tell how much I appreciate your coming by and seeing the Raven. The quilting is actually a line drawing of one of Poe's houses with a tree in the front in Baltimore.
ReplyDelete